In the process of using the Kvaser Memorator recorder, you will often encounter some possible problems. This article will describe the use of Kvaser Memorator and the possible problems from the following aspects.
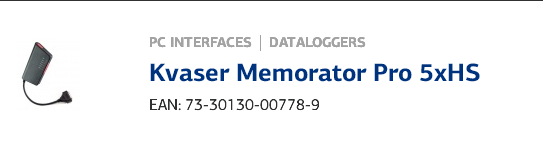
The hardware used in this article is Kvaser Memorator Pro 5xHS, serial number 00778-9;
The configuration software is Kvaser Memorator Config Tool, version V5.11.879.
1. About the choice of new and old version configuration software
The old version of Kvaser Memorator (blue and white), to use the old version of Kvaser Memorator Config Tool, version model is V4.9.164.
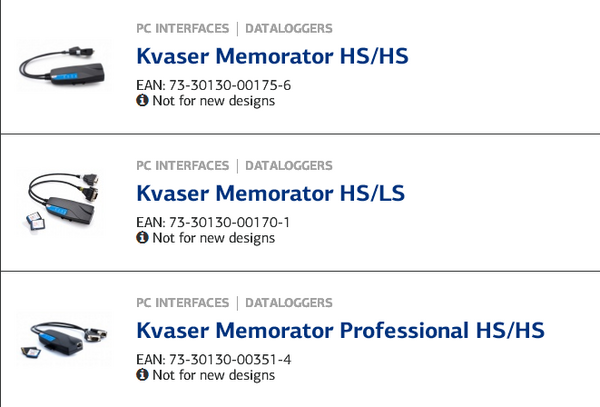
The new version of Kvaser Memorator (pure black), to use the new version of Kvaser Memorator Config Tool, version model is V5.11.879.
Note: Kvaser Memorator Config Tool can be downloaded from Kvaser official website https: //.
Second, the recorder is connected to the computer
First connect the recorder to the computer through the USB interface. After successfully connecting to the computer, the recorder PWR light is green and always on.
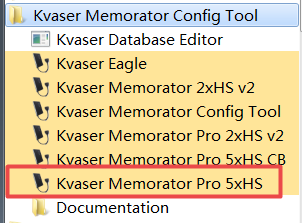
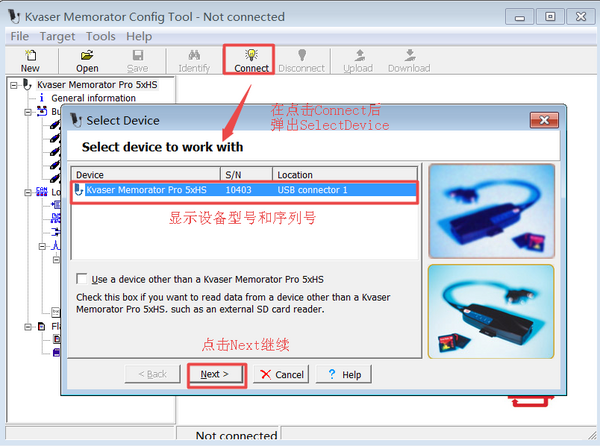
1. Open Kvaser Memorator Config Tool-> Kvaser Memorator Pro 5xHS in the start menu;
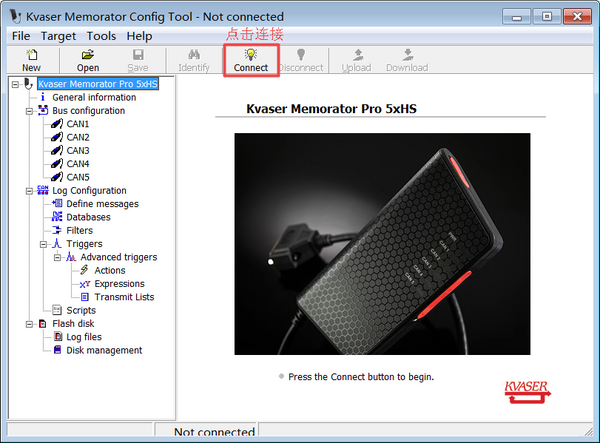
2. Connect the recorder (Connect> Next-> Finish);
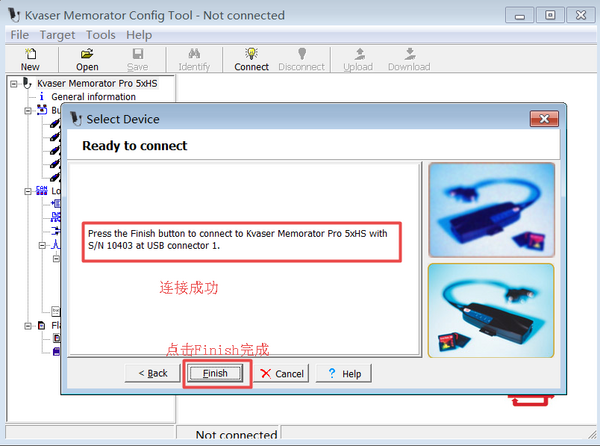
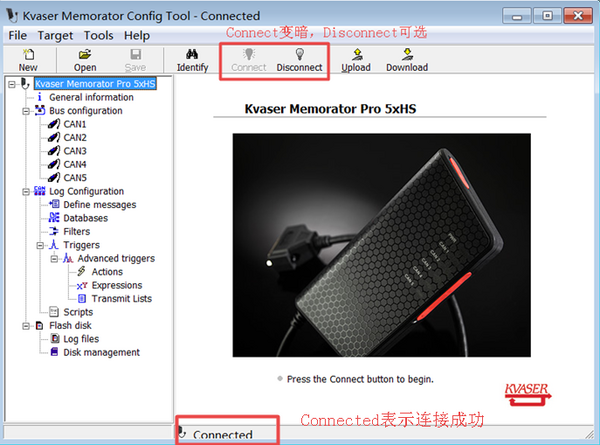
3. The state after successful connection;
After the connection is successful, the PWR lamp and CAN communication lamp of the recorder flash alternately.
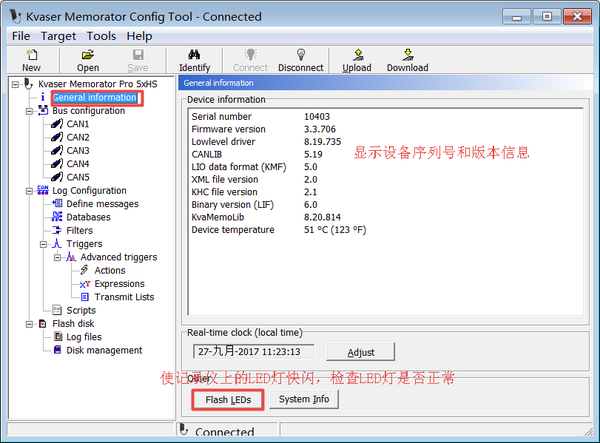
4. View device information;
If the PWR light or CAN communication light is abnormal, you can click Flash LEDs to make the LED flash quickly and check whether the LED is damaged.
Third, the recorder CAN channel configuration
1. Display CAN channel configuration information;
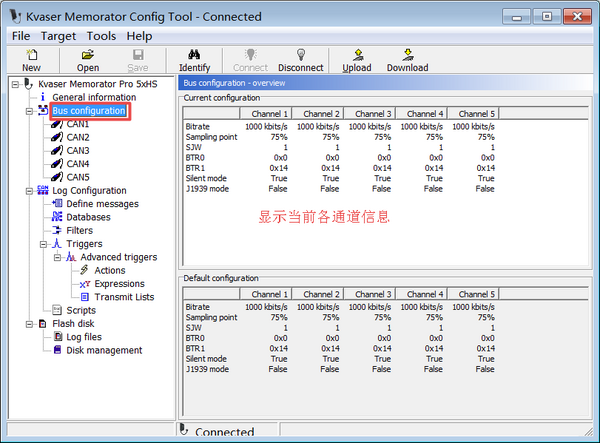
2. CAN channel setting;

3. Add Databases in Log Configuration;
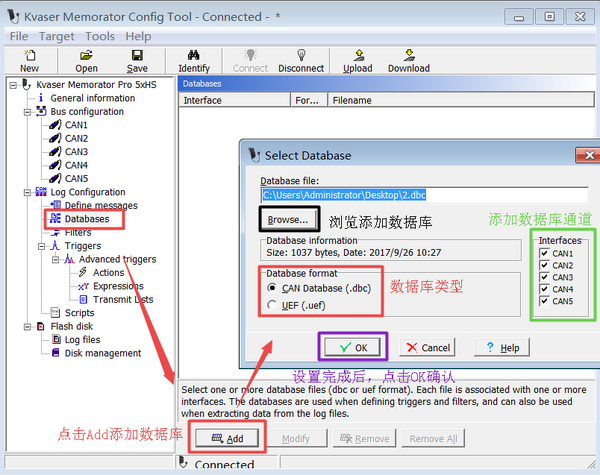
4. After the addition is complete, the database information is displayed;
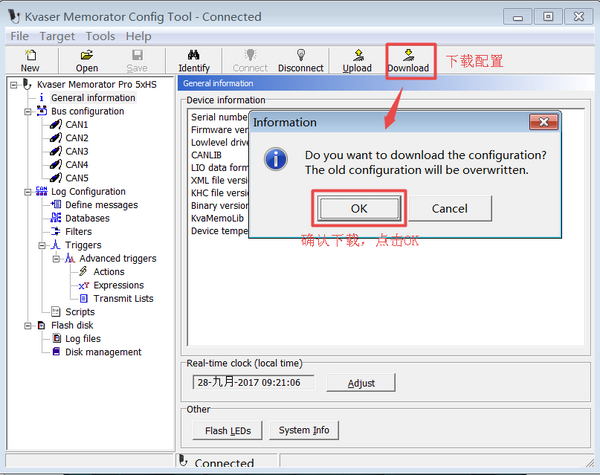
Four, download configuration
1. After the configuration is completed, download the configuration to the recorder;
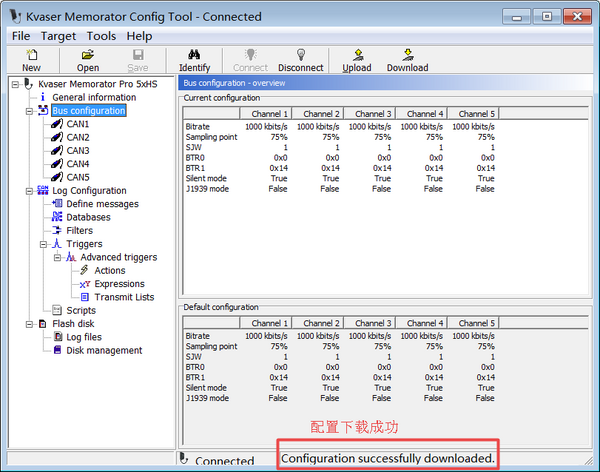
2. The configuration download is successful;
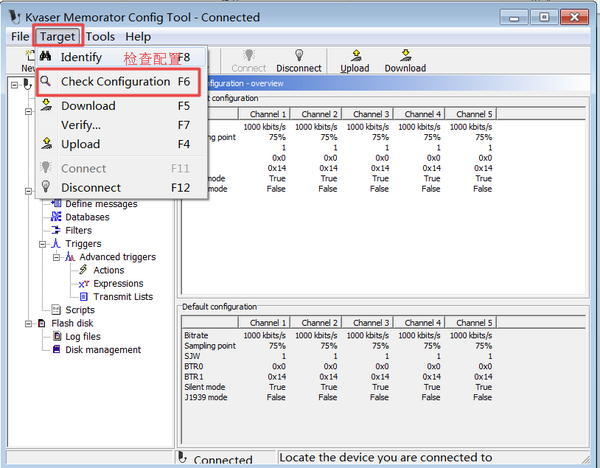
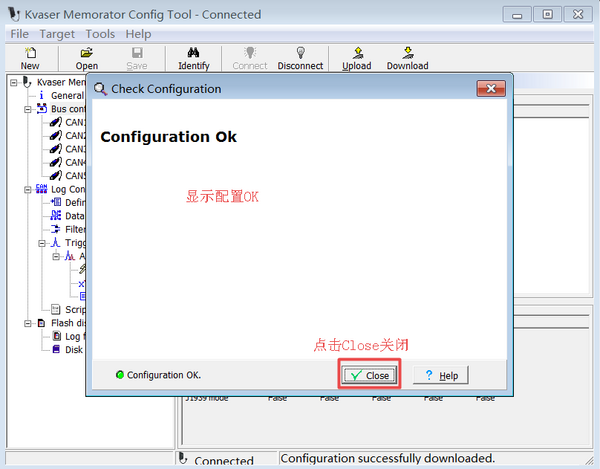
3. Check the configuration;
4. Configuration result;
V. Inspection process of recorder
Recorder inspection can be divided into two aspects: (1) as a CAN card for communication (2) as a recorder to record and store data.
5.1 Communication as CAN card
When communicating as a CAN card, connect the recorder to another CAN card with D-SUB9 (pins 2 and 7).
Note: 120 ohm termination resistance should be added in the middle.
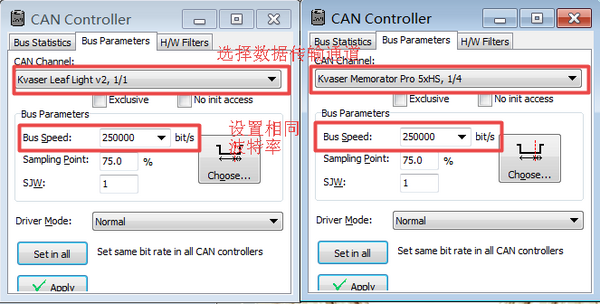
1. Open the CANKing software separately, configure the use channel and the same baud rate;
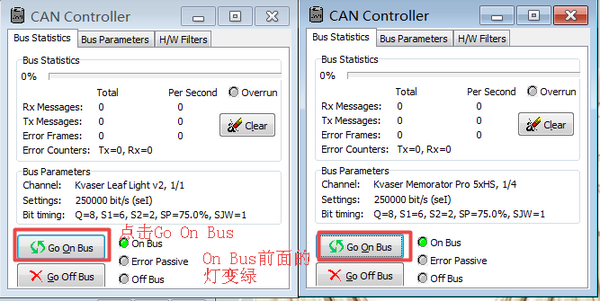
2. Go On Bus;
3. Send and receive data;
The recorder sends data, another CAN card receives;
The CAN card sends data, and the recorder serves as the receiving end to receive the data;
If the transceiver is normal, the recorder can be used normally as a CAN card.
5.2 Use as a recorder
When used as a recorder, the steps are as follows:
1. First, configure the recorder channel;
2. Download the configuration to the recorder;
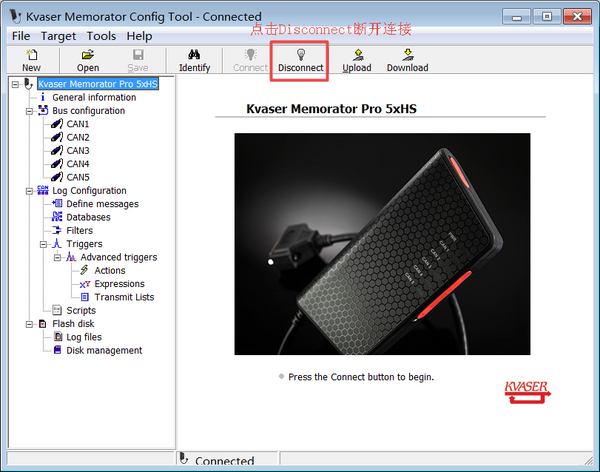
3. Click Disconnect to disconnect the recorder and disconnect the USB connection of the recorder;
4. Connect the 9-40 pin of CAN1 channel to 8-40V voltage for external power supply, and the 3 pin to GND;
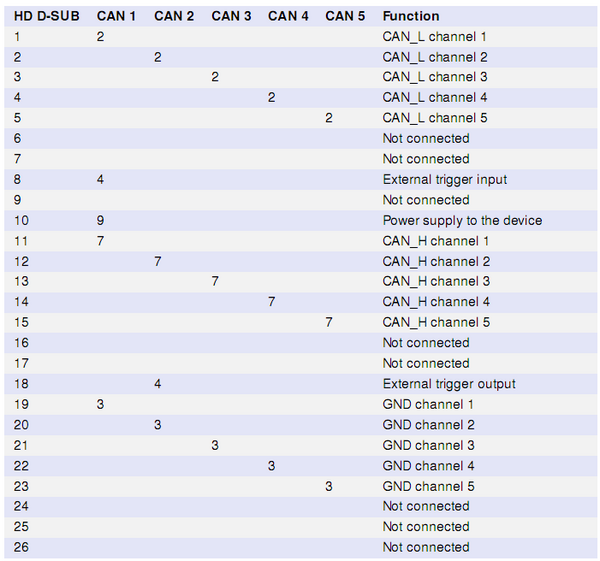
5. Use CAN # 1-5 to communicate with another CAN card by adding 120 ohm terminal resistance between the 2 and 7 pins of D-SUB9, and the data will be stored in the SD card
6. After the data recording is completed, disconnect the external power supply and reconnect the recorder to the computer via USB;
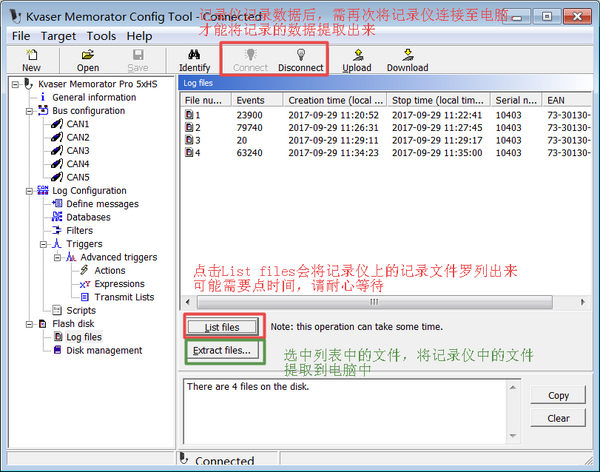
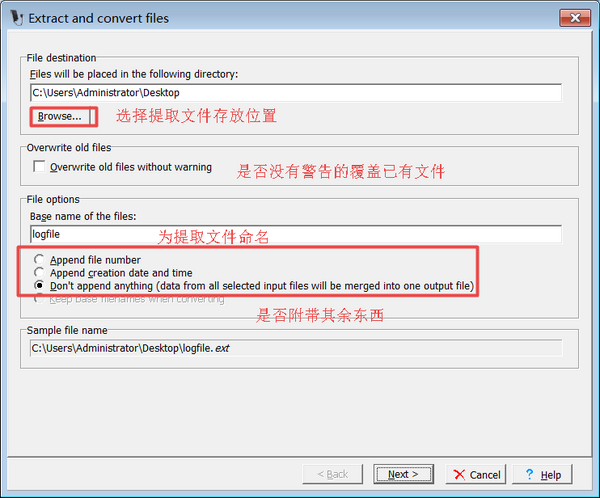
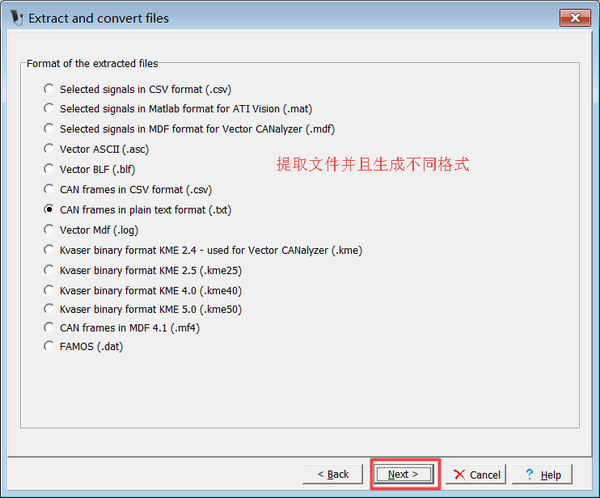
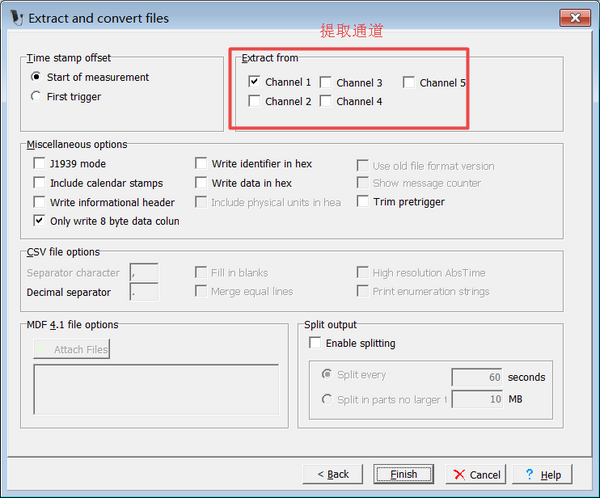
7. Extract files: FlashDisk-> LogFiles extract files;
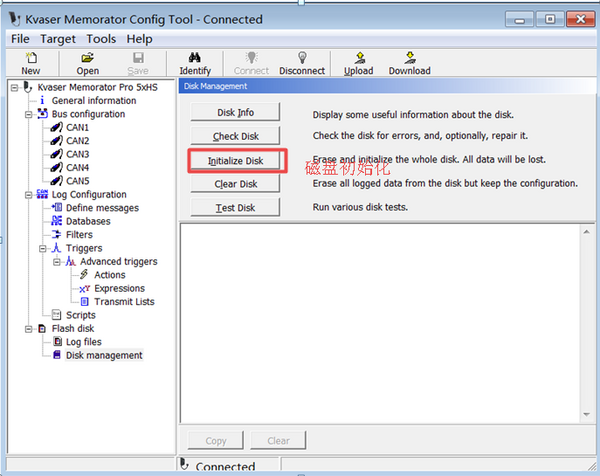
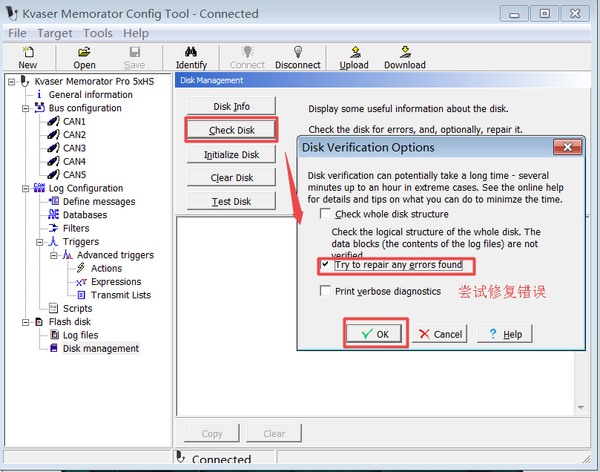
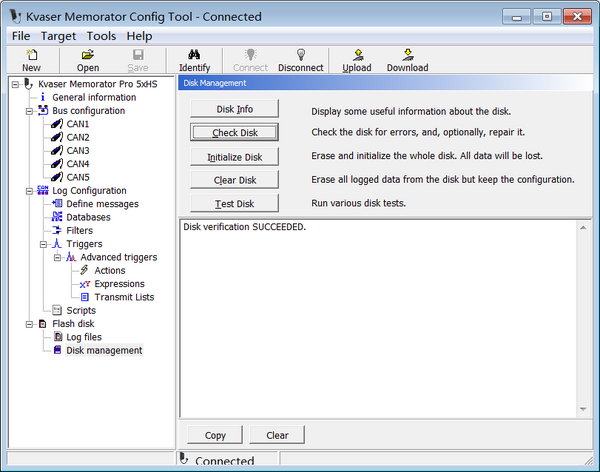
Six, FlashDisk disk management
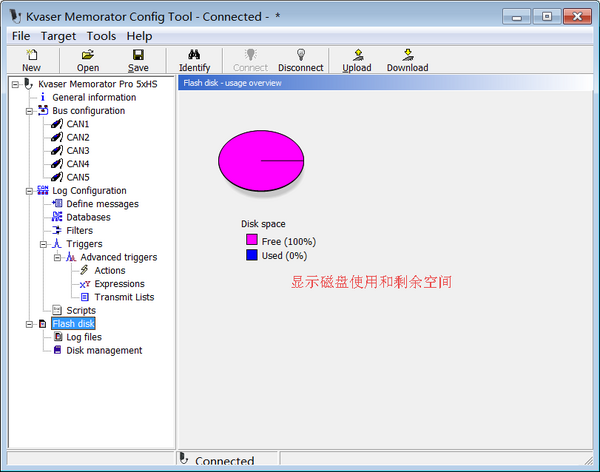
1. Display disk usage and remaining space;
2. If you encounter disk problems, try to initialize the disk to view the problem;
3. Check the disk error;
4. Successful inspection;
Aquarium Feeder,Automatic Fish Feeder For Aquarium,Automatic Fish Feeder For Pond,Aquarium Fish Feeder Automatic
Shenzhen GAKO Aquatics Products Co., Ltd , https://www.gako-aquarium.com